
Few foods do more with less than onigiri. A warm handful of salted rice, shaped with your palms, wrapped in crisp nori — and suddenly lunch is settled. In Japan these rice balls show up everywhere: tucked into bento boxes, sold by the thousands at convenience stores, packed for train rides and picnics. They are portable, satisfying, and surprisingly easy to make at home once you know a few small tricks.
This guide walks you through the basics, then gives you three fillings to try: classic salted salmon, tangy umeboshi plum, and yaki onigiri — rice balls brushed with a savory glaze and grilled until the outside turns golden and crisp. Make one version or all three; the rice technique stays the same.
What Makes Good Onigiri
It starts with the right rice. Short-grain Japanese rice is non-negotiable here — its high starch content is what lets each ball hold together without glue or mashing. Long-grain varieties like jasmine simply fall apart in your hands. Cook the rice a touch firmer than you would for a regular bowl: slightly al dente grains keep their shape and make neater triangles.
Salt does two jobs in onigiri. First, it seasons the rice from the inside out — a pinch rubbed onto your damp palms before shaping is the traditional method, and it distributes seasoning more evenly than stirring salt into the pot. Second, salt was historically a preservative, which is why onigiri kept so well in packed lunches.
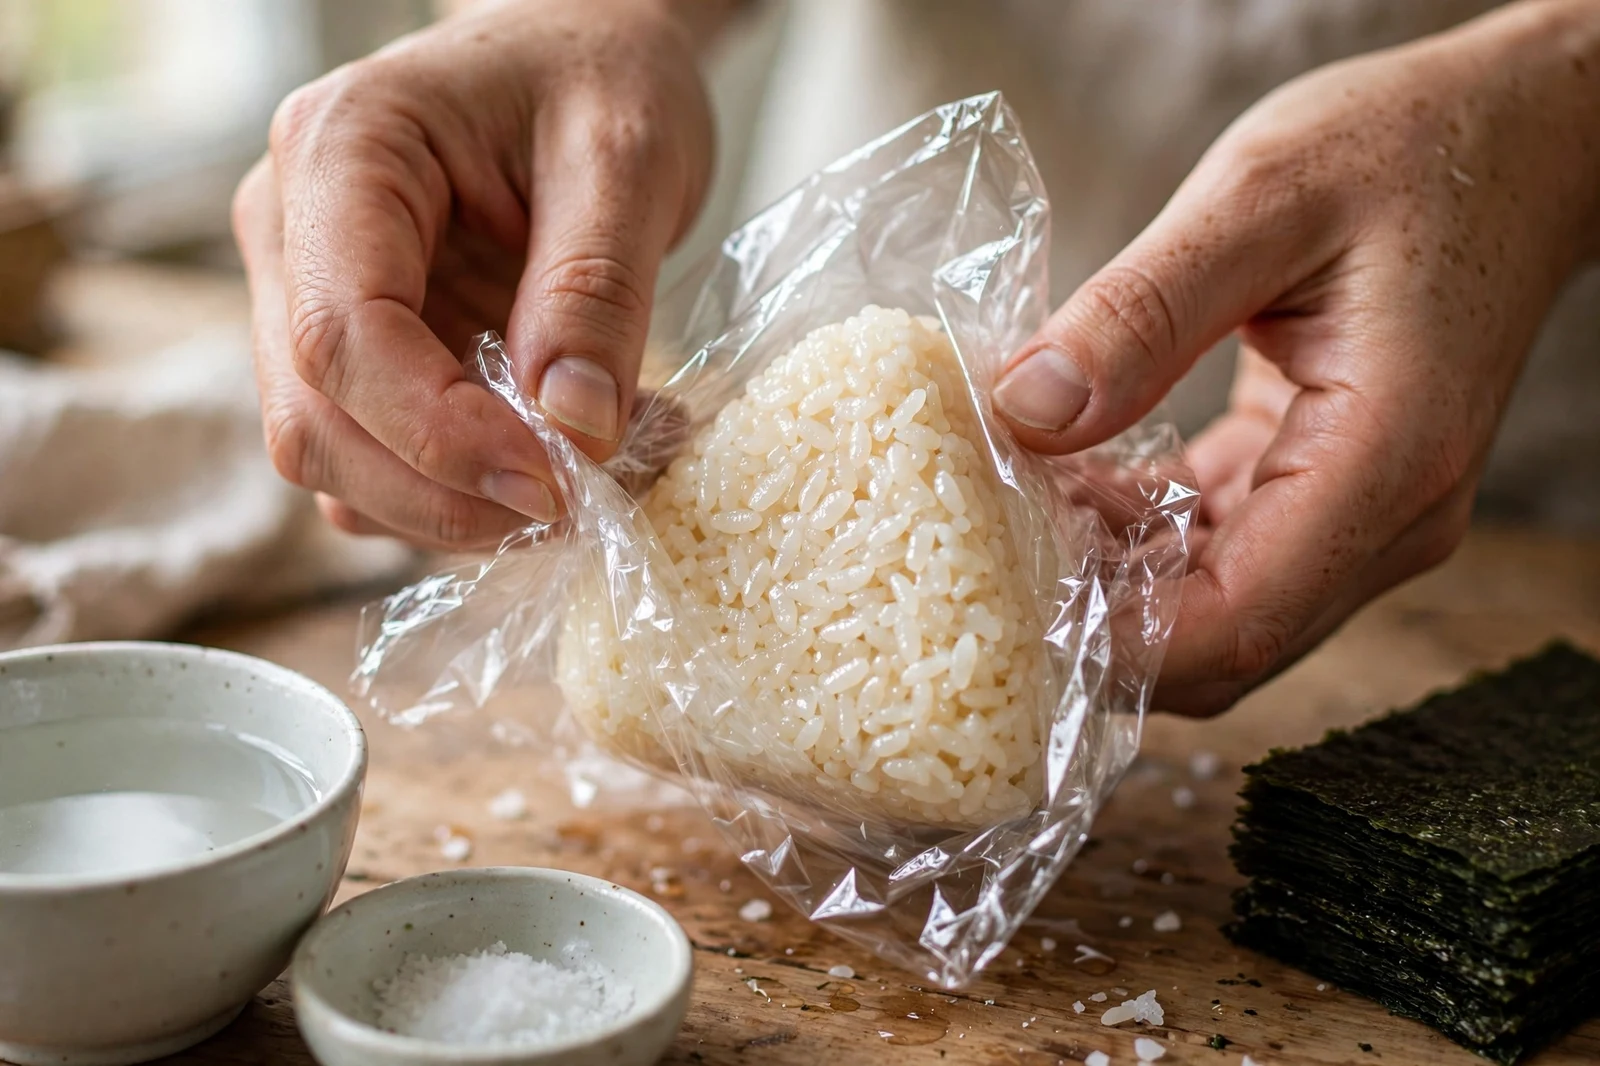
The other secret is water on your hands. Keep a small bowl of water nearby and wet your palms before shaping each ball. Wet hands keep the rice from sticking to your skin, and the salt you rub on afterward dissolves into the surface for flavor. Plastic wrap helps too — shaping inside a piece of wrap is the beginner-friendly path to tidy triangles.
Fillings, Three Ways
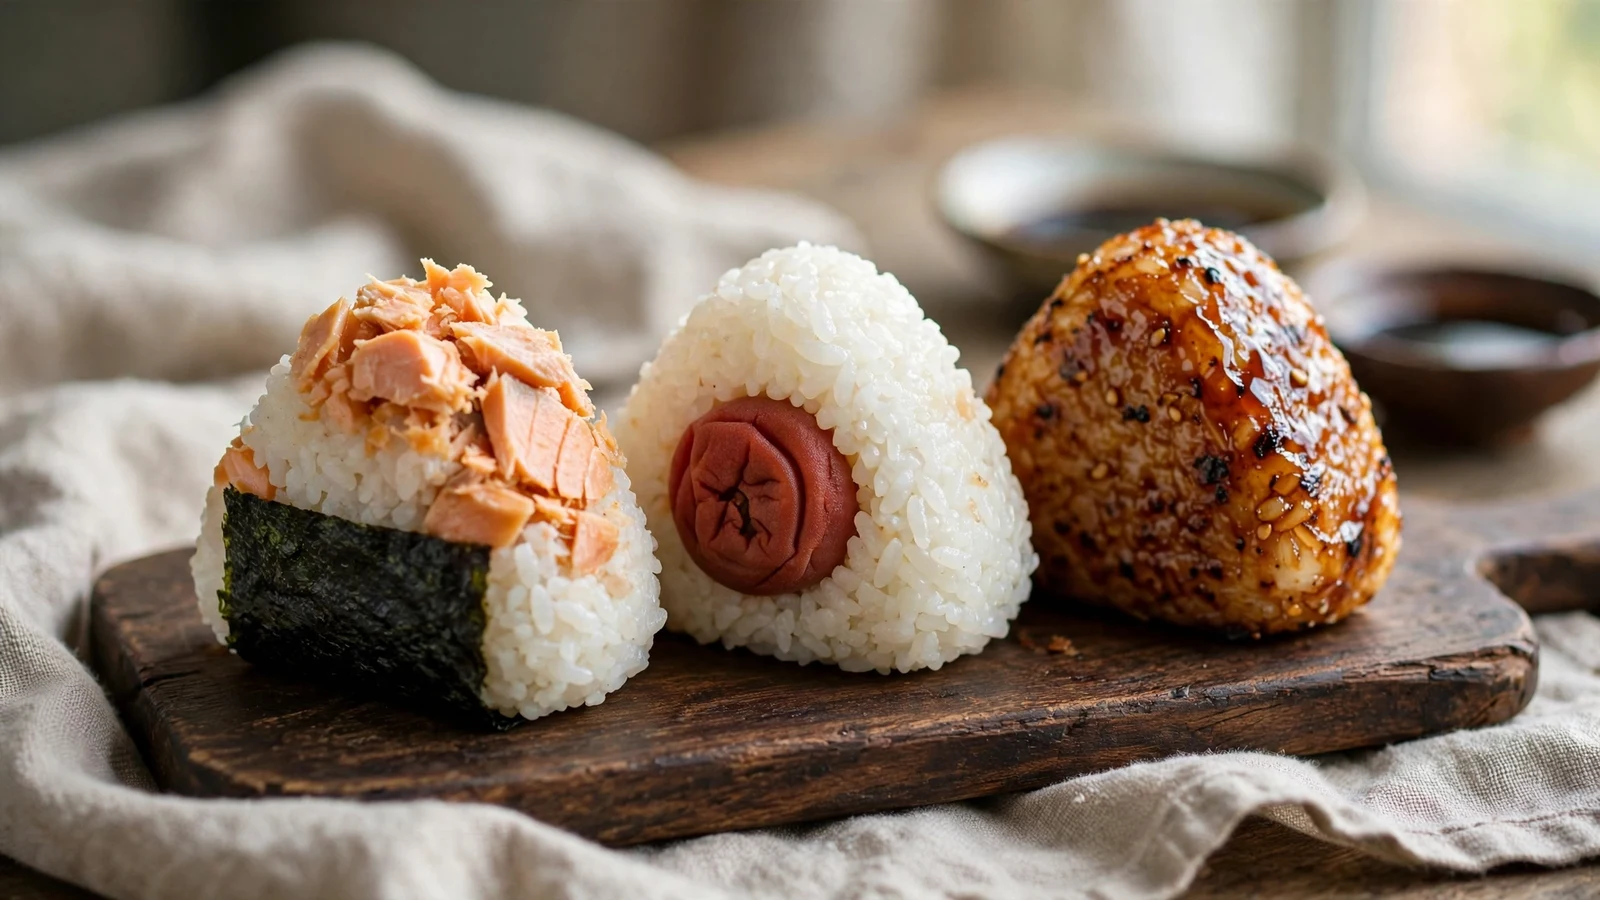
Salted salmon (shaké) is the most popular onigiri filling in Japan for a reason: flaky, savory fish with a little salt is exactly what warm rice wants. A small piece of salmon per ball is plenty.
Umeboshi — intensely salty-sour pickled plum — is the traditional choice. You only need half a plum per onigiri; a little goes a long way, and the tart pop against plain rice is wonderful.
Yaki onigiri skips the filling entirely. Instead, the shaped rice balls get brushed with a soy-miso glaze and pan-grilled until the surface caramelizes. The contrast between the crisp, savory shell and the soft rice inside is the whole point — this one is best eaten hot, right off the pan.
Ingredients
For the rice
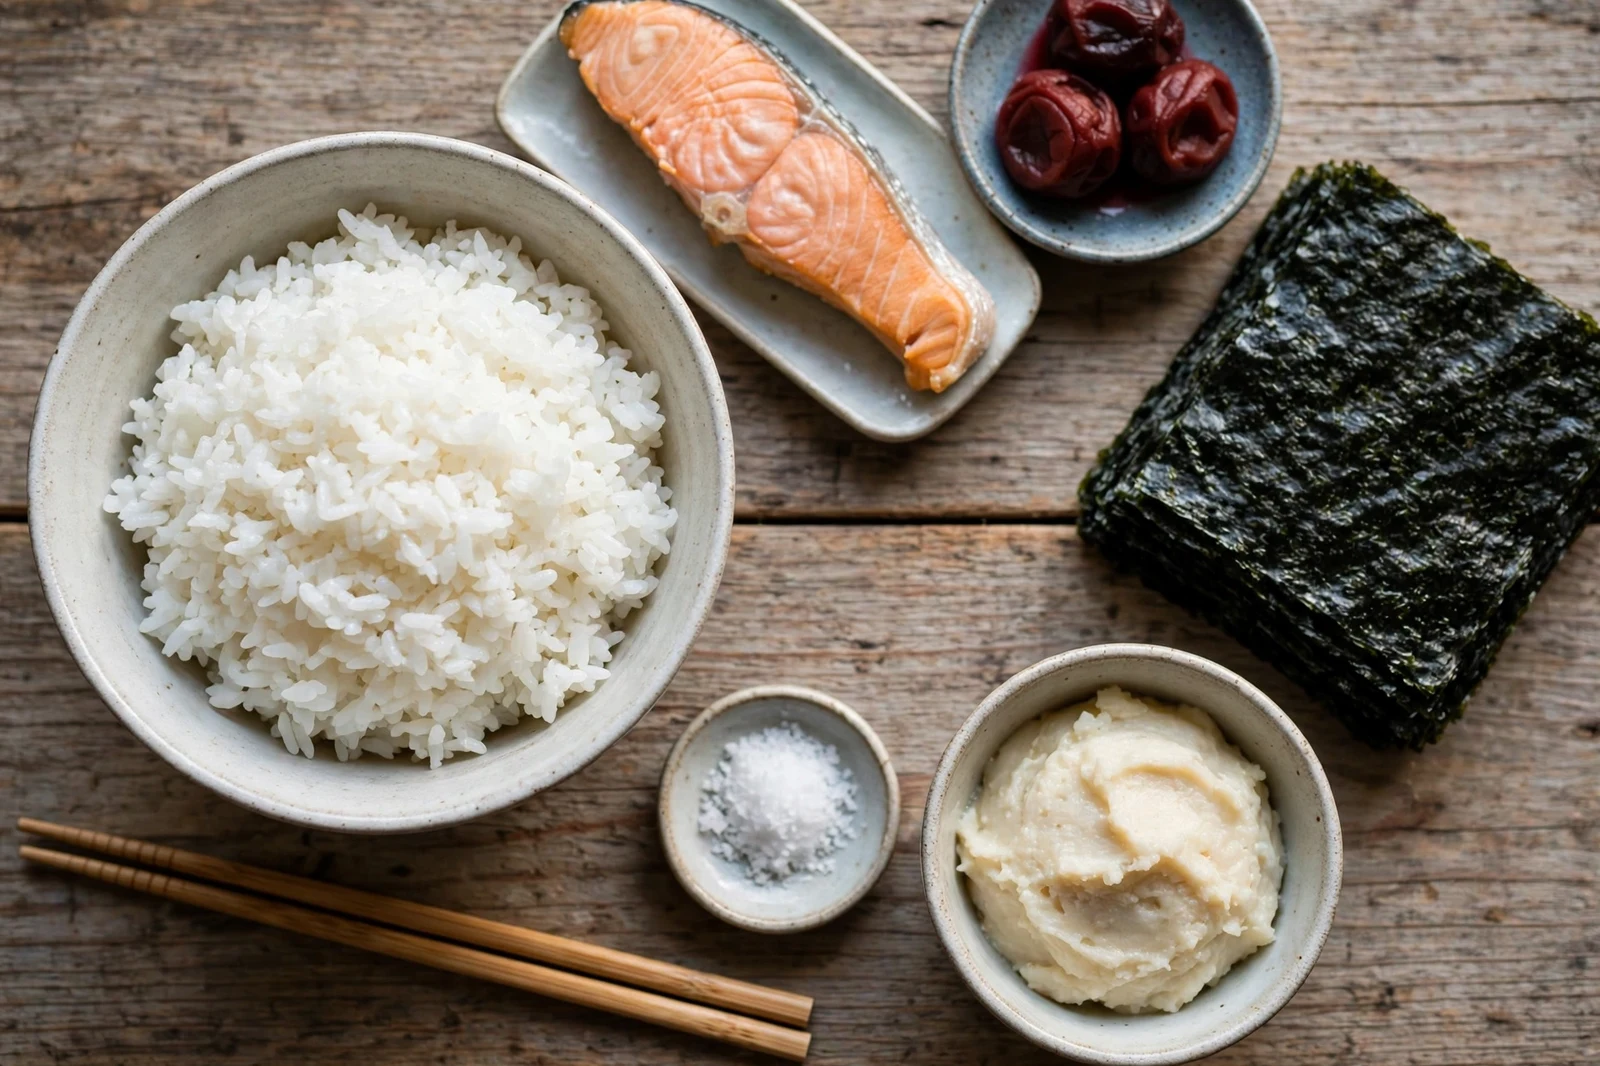
- 2 cups uncooked short-grain Japanese rice
- 2 cups plus 2 tablespoons water
- 1 1/2 teaspoons fine sea salt, plus more for shaping
Salmon filling
- 6 ounces salmon fillet
- 1/2 teaspoon salt
Umeboshi filling
- 4 umeboshi (Japanese pickled plums), pitted and halved
For assembly
- 4 full sheets nori, cut into 2-inch-wide strips (about 16 strips)
- Salt for your palms
- A small bowl of water
Yaki onigiri glaze
- 2 tablespoons white miso
- 1 tablespoon mirin
- 1 teaspoon soy sauce
- 1 teaspoon sugar
This recipe makes 8 onigiri: four filled (two salmon, two umeboshi) and four yaki. Scale up or down as you like.
Instructions
Cook the rice
1. Rinse the rice. Place the rice in a large bowl, cover with cold water, and swirl with your hand — the water will turn milky. Drain and repeat 3 or 4 times, until the water runs mostly clear. Drain well and let the rice sit in the strainer for 15 minutes.
2. Cook. Add the rice and water to a pot with a tight lid (or a rice cooker). Bring to a boil over high heat, then reduce to low and simmer, covered, for 12 minutes. Do not lift the lid. Remove from the heat and let it steam, still covered, for 10 minutes.
3. Season and fluff. Sprinkle the 1 1/2 teaspoons of salt over the rice and fluff gently with a rice paddle or wooden spoon, cutting and folding rather than stirring. Let it cool until you can comfortably handle it — warm, not hot.
Prepare the fillings
4. Cook the salmon. While the rice cooks, salt the salmon fillet and broil or pan-sear it until just cooked through, 6 to 8 minutes. Let it cool slightly, then flake it into small pieces with a fork, discarding the skin. You need about 1 tablespoon of flakes per salmon onigiri.
5. Prep the umeboshi. Halve the pitted plums if they are large. Have them ready in a small dish.
6. Mix the yaki glaze. Stir the miso, mirin, soy sauce, and sugar in a small bowl until smooth.
Shape the onigiri
7. Set up your station. Wet your palms in the water bowl and rub a pinch of salt between them. Lay out a sheet of plastic wrap roughly 8 inches square — this makes shaping far easier.
8. Fill and shape. Scoop about 1/3 cup of warm rice into the center of the wrap. Press a shallow well into the middle with your thumb and tuck in 1 tablespoon of salmon flakes or half an umeboshi. Fold the rice over the filling, gather the wrap corners, and press the rice into a firm triangle, rotating as you go so the shape is even. The rice should hold together but not be packed rock-hard — a little air keeps the texture pleasant.
9. Wrap with nori. Peel off the plastic wrap and press a strip of nori around one side of the triangle, like a little belt. The nori goes on last so it stays crisp.
Make the yaki onigiri
10. Shape plain triangles. Using the same wet-hands-and-salt method, shape the remaining rice into 4 plain triangles (about 1/3 cup rice each). No filling.
11. Grill. Heat a nonstick skillet over medium heat and add the triangles. Toast 2 to 3 minutes per side, until lightly golden. Brush one side of each with the miso glaze, flip, and grill another 1 to 2 minutes until the glaze caramelizes. Brush the other side, flip once more, and grill until both sides are crisp and golden. Serve immediately.
Tips and Variations
- Keep the rice warm while you work. Cold rice does not stick as well. If your rice cools too much, cover the bowl with a damp towel.
- Nori goes on last. Nori turns chewy within minutes of touching warm rice, which is fine — many people love it soft. But for that convenience-store crispness, wait until just before eating.
- Storage: Onigiri are best the day they are made. If you must keep them, wrap each one tightly in plastic wrap and refrigerate; the rice firms up when cold, so let them come back to room temperature or give them 20 seconds in the microwave. Filled onigiri keep for one day.
- Tuna mayo onigiri: Mix a small can of drained tuna with 2 tablespoons of Japanese mayonnaise and a pinch of salt — another convenience-store classic that needs no cooking.
- Add toasted sesame: Fold 1 tablespoon of toasted sesame seeds into the rice for extra flavor and a speckled look.
- Vegan option: The umeboshi and yaki versions are already plant-based — just skip the salmon.
Onigiri pair beautifully with a simple bowl of classic miso soup, which takes about 10 minutes and needs no special equipment. For a full Japanese-style lunch spread, serve them alongside crisp agedashi tofu — the warm dashi broth plays nicely against the salted rice.
Once you have the shaping down, the variations are endless. Konbu, pickled mustard greens, salted cod roe — whatever you have, the rice is ready for it.