
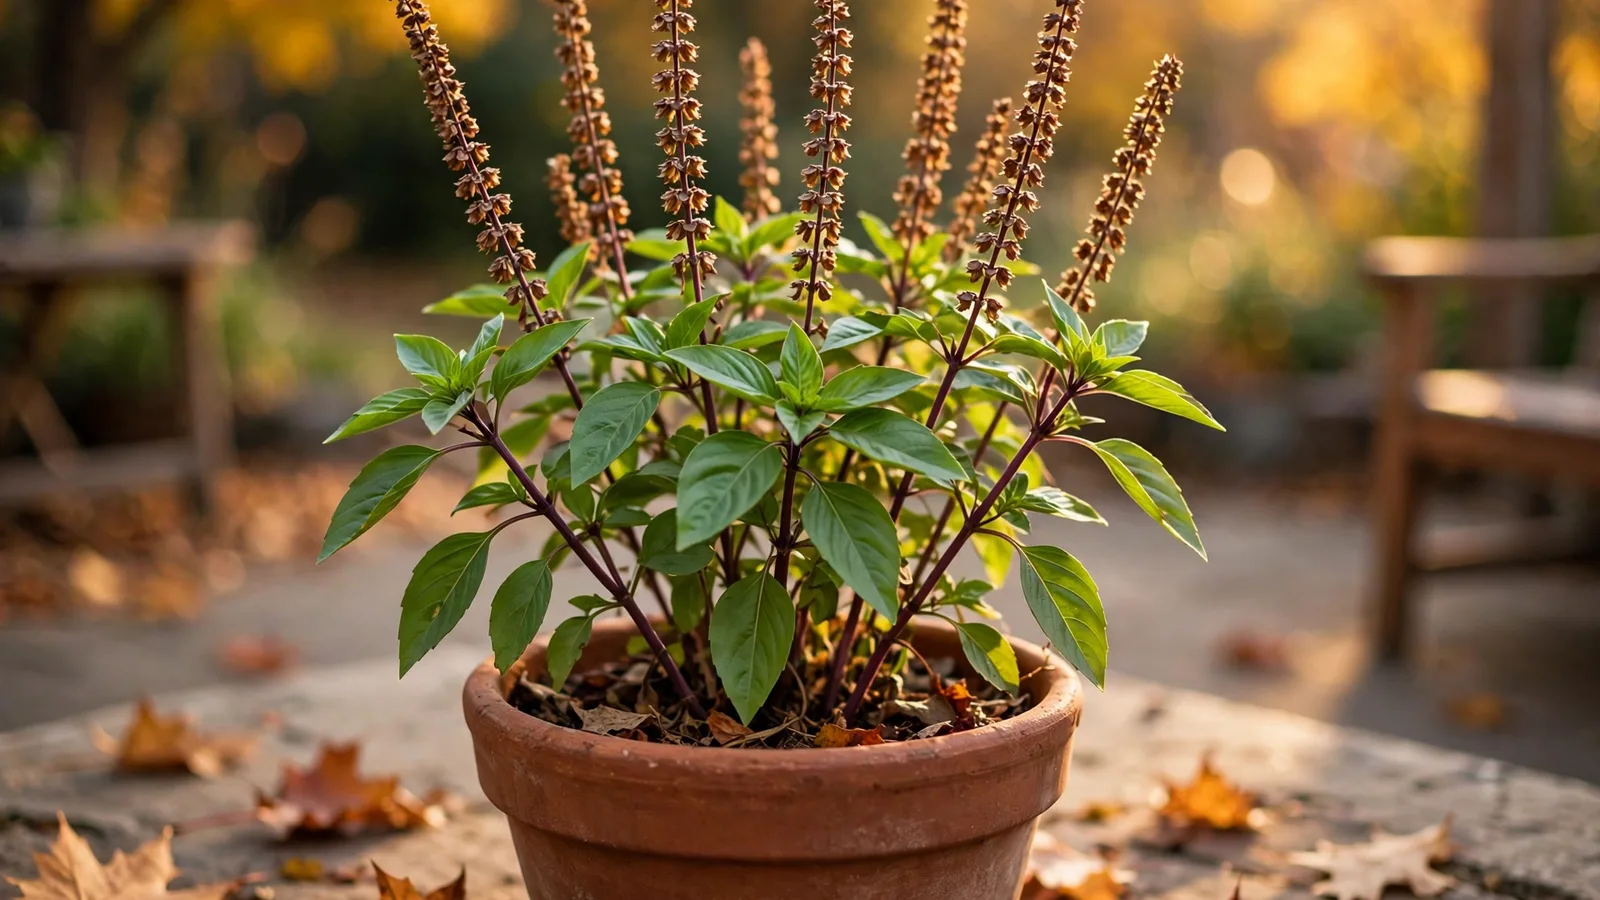
Thai basil is the herb that makes a bowl of pho taste like a bowl of pho. The purple stems, the anise-clove scent, the way a handful of leaves can carry an entire soup — once you have a healthy plant on the patio, you want that exact plant again next year. Saving your own seed is how you make that happen, and it costs nothing but a little patience at the end of the season.
The short version: let one or two plants flower, let the seed heads dry on the plant, and collect them on a dry day before fall rain arrives. Timing is nearly everything. Pick too early and the seed is pale and weak. Wait too long and it shatters onto the potting soil, and you are harvesting volunteers instead of seeds.
You need no special equipment. A paper bag, a shallow bowl, a fine kitchen strainer, and paper envelopes will carry the whole job. If you grow Thai basil with the rest of your herbs, this fits neatly into the setup in our Vietnamese herb container garden plan.
Why Save Your Own Seed?
Packaged Thai basil seed is cheap, so this is not really about money. Your plants have already proven themselves in your exact conditions. A plant that stayed healthy through your hot spells, your watering habits, and your balcony’s afternoon sun has shown you something a seed packet cannot promise: its children start life pre-selected for your patio.
Fresh seed also germinates well. Basil seed that you dry properly, store cool and dry, and sow the following spring tends to come up fast and thick. Old packets of unknown age are a gamble by comparison. And one plant makes a lot of seed — hundreds from a single strong plant allowed to flower fully, enough to replant your pots, sow a small bed, and still have some left to share. The same end-of-season habit works for perilla, covered in our guide to growing perilla (shiso) in pots.
First, Know What You Are Growing
Thai basil (Ocimum basilicum var. thyrsiflora) is open-pollinated, which is good news: seed saved from it grows into plants much like the parent, as long as the flowers were pollinated by Thai basil and not by a different basil blooming right next door.
That caution matters. All sweet basils cross readily when bees move between them. If your Thai basil flowers at the same time as a Genovese or lemon basil in the next pot, some saved seed will grow into in-between plants — pleasant, but not true Thai basil. To keep the line true, grow only one basil type for seed in a season and pinch the flowers off the others, or separate flowering basils into different corners of the yard. Or accept a little mixing and treat the saved seed as a home blend. Many gardeners do exactly that and eat very well.
If your plant came from a packet labeled hybrid (F1), seedlings may not match the parent closely. Most Thai basil sold for home gardens is a stable open-pollinated type, so this rarely comes up — but check the packet if you kept it.
Choose Your Seed Plants
Pick seed plants while they are still in their prime, in mid to late summer. Choose the healthiest, most strongly scented plants with good purple stem color and sturdy growth. Skip any plant that struggled, stayed stunted, or mildewed early. You are selecting next year’s genetics, so be picky.
Once a plant is chosen, stop pinching it. Pinching keeps basil bushy and leafy by removing flowering tips, and a seed plant needs the opposite. Let it grow tall, branch freely, and send up its purple flower spikes. Keep harvesting leaves from your other plants as usual.
Water and feed the seed plant normally. A stressed, dried-out plant rushes to flower and sets thin seed. A well-tended plant flowers longer, sets more seed, and ripens it better.
Let It Flower and Set Seed
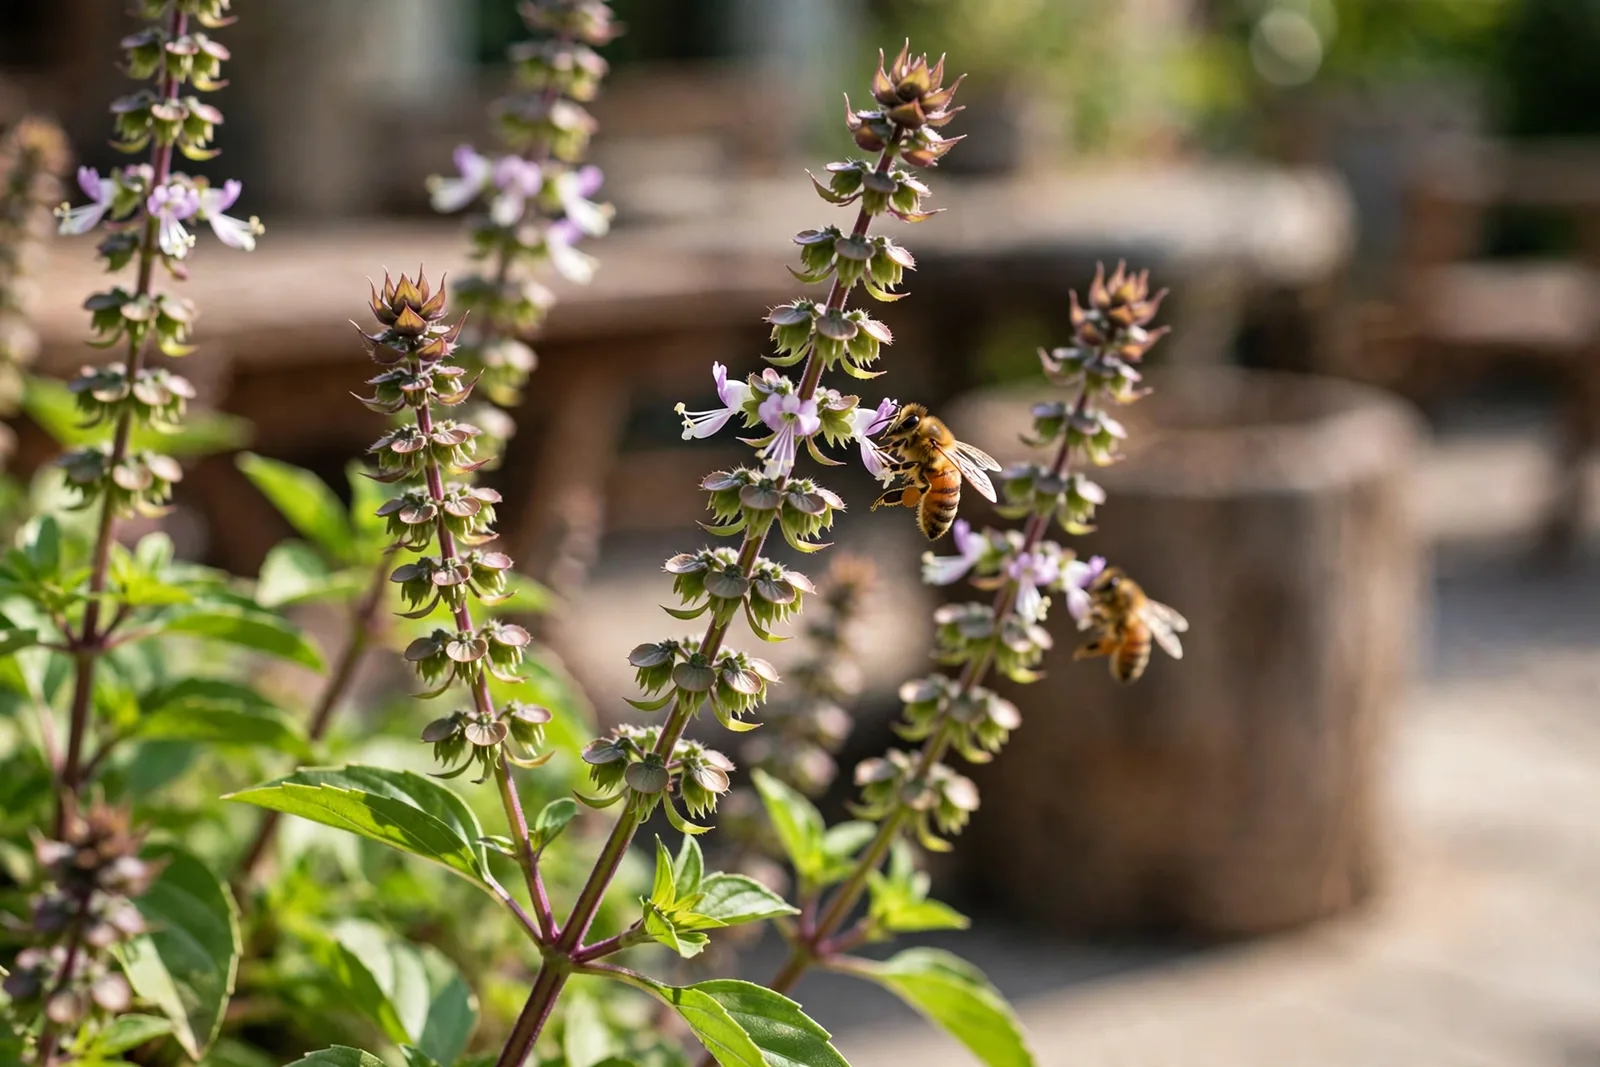
Thai basil flowers are small, purple-white, and arranged in whorls up a showy spike. Bees love them, which is what you want — basil seed forms after pollination, and a plant visited by bees sets full, plump seed heads.
After the petals drop, the little green cups (calyxes) that held the flowers stay on the spike, and the seeds form inside them. Everything is still green and soft at this stage. Your only jobs are to keep the plant watered and resist tidying it up. The plant will look rangy and tired — stems woody at the base, leaves fewer and smaller. That is normal. It is putting its energy into seed now, not leaves.
Expect this stage to run several weeks. Seed ripens gradually, with the lowest whorls on a spike maturing first while the tip is still flowering. That staggered ripening is why a single harvest date never quite works.
Watch for the Right Color
Ripe basil seed announces itself through the plant, not the calendar. Look for these signs:
- The flower spike turns from green and purple to tan, then brown.
- The little calyx cups feel dry and papery between your fingers, not soft and green.
- When you shake a dry spike over your palm, a few tiny dark seeds drop out.
Mature seeds are small, oval, and dark brown to nearly black. Pale tan or green seed is unripe and germinates poorly, if at all. A spike is ready when most of it has browned and the seeds inside have darkened, even if a few green bits remain near the tip.
Weather matters too. Seed ripens best in dry fall air. If your autumns are rainy, watch closely — a long wet spell on mature spikes invites mold, and you may need to cut slightly early and finish drying indoors.
Harvest the Seed Heads
Harvest on a dry day, late in the morning after the dew has lifted. Wet seed heads mold fast in a bag, so this is not a job for a drizzly Saturday.
- Hold a paper bag open and bend a dry seed spike down into it.
- Snip the spike off with scissors or pruners, letting it fall straight into the bag. Basil seed shatters at a touch when fully ripe, and the bag catches what falls.
- Work spike by spike. If some spikes are still green, leave them and come back in a week. Two or three passes collect far more good seed than one impatient pass.
- Label the bag with the variety and date right away. Every gardener swears they will remember. Every gardener is wrong by February.
If rain is coming and the spikes are nearly ripe, cut them anyway and finish indoors: stand them head-down in a paper bag or lay them on a tray in a warm, dry room with air moving. They will dry and release seed over the following week.
Dry, Rub, and Clean the Seed
Even seed cut brown benefits from a finishing period. Leave the spikes in the open paper bag, or spread them on a tray lined with paper, in a dry spot indoors for one to two weeks. Fully, evenly dry seed is the difference between seed that keeps for years and seed that molds by Christmas.
Once the heads are crisp, cleaning is simple kitchen work:
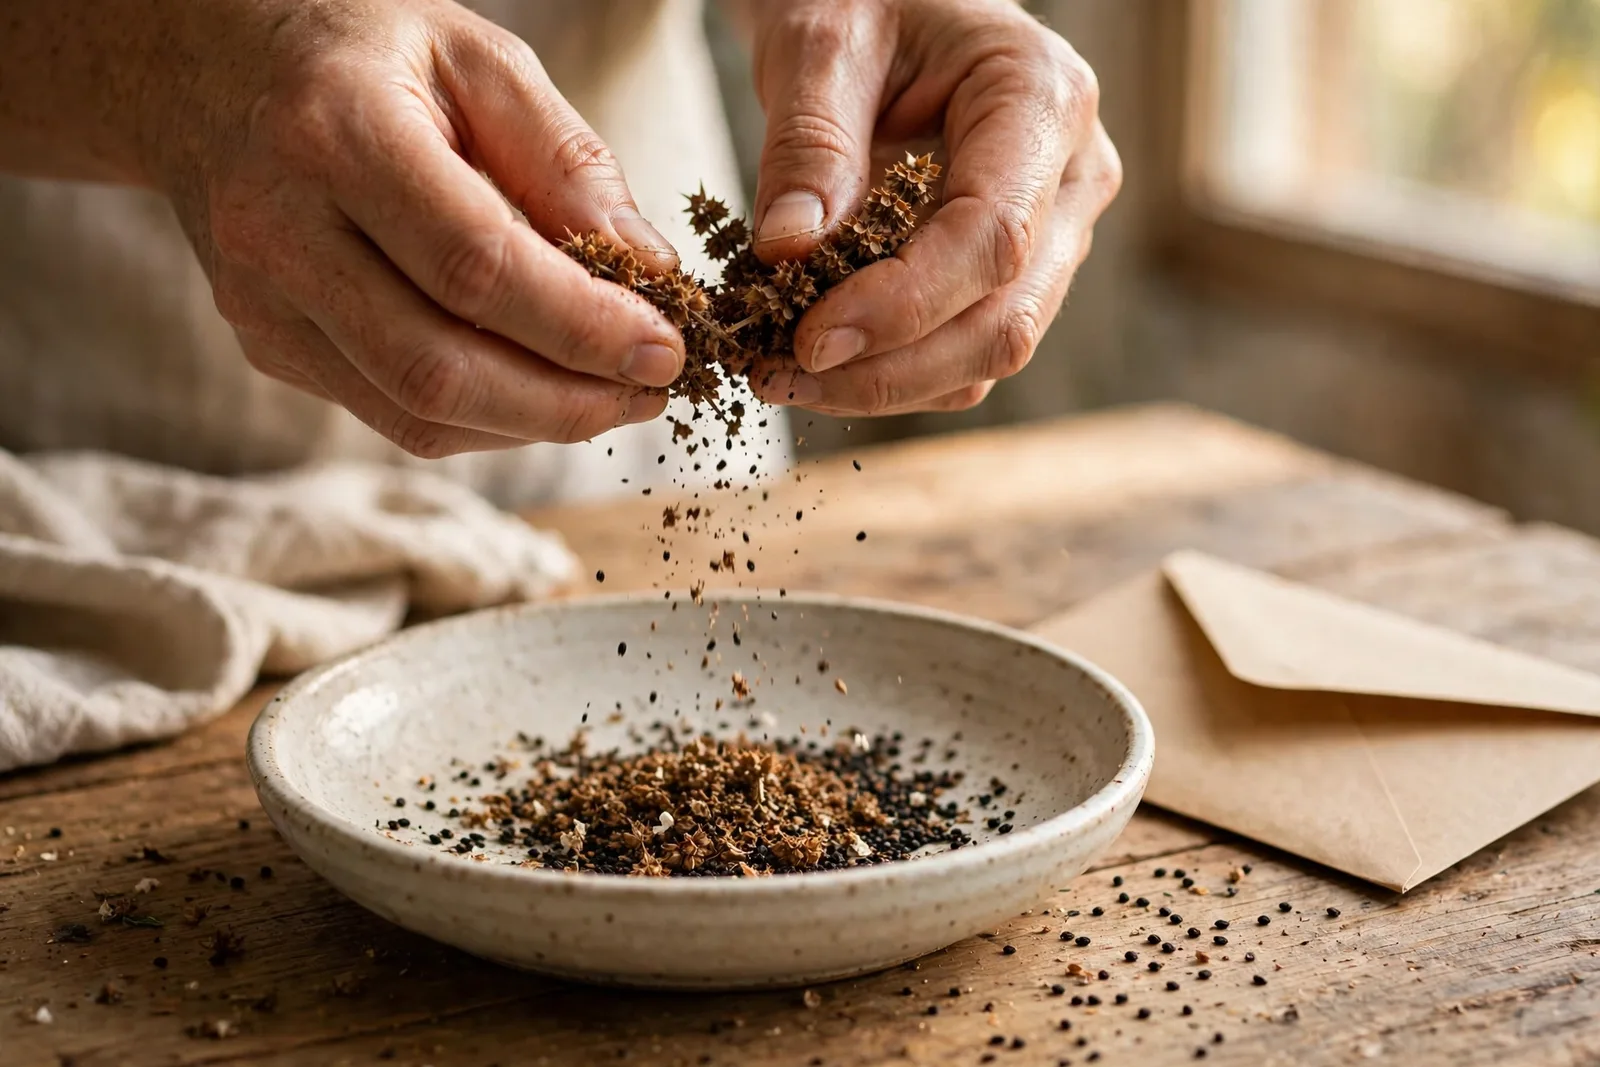
- Rub the seed heads between your palms or crush them gently over a shallow bowl. The seeds fall out and sink; the papery chaff stays light.
- Pour everything through a fine kitchen strainer, or tip it onto a plate and blow gently across it outdoors — the chaff lifts away and the heavier seeds stay.
- Pick out any remaining bits of stem or petal by hand. The seed does not need to be laboratory-clean, just free of damp or chunky debris that could hold moisture.
Keep the whole process dry. Basil seed turns slippery and gelatinous when wet (it is a cousin of chia in that respect), which is why you never wash it during cleaning.
Store It Right
Dry seed goes into a paper envelope labeled with the variety and harvest year. Paper beats plastic here because it breathes — any trace of leftover moisture can escape instead of condensing on your seed. Put the envelopes in a sealed jar with a silica gel packet or a spoonful of dry rice, and store it somewhere cool, dark, and dry: a drawer, a closet shelf, or the refrigerator door.
Stored that way, Thai basil seed stays strongly viable for two to three spring sowings, often longer, with germination slowly tapering each year. When spring returns, our seasonal calendar for Asian greens times basil with the other warm-season plantings — after the last frost, once the soil has warmed.
A Quick Germination Check
If you sow seed that is two or more years old, spend ten days on a simple check first. Fold ten seeds into a damp paper towel, seal it in a bag, and keep it warm. Count how many sprout. Eight out of ten means sow as usual. Four out of ten means sow twice as thick and plan on fresh seed this fall.
Common Problems and Fixes
The seed heads molded. They went into the bag wet, or fall turned rainy before harvest. Next year, cut earlier and finish drying indoors with air moving around the tray. Moldy seed goes in the trash, not the garden.
Hardly any seed in the heads. Usually the plant flowered but pollinators were scarce, or it was cut too green. Leave spikes until fully brown, and grow the seed plant near other flowers to draw bees in.
Seedlings do not taste like Thai basil. Cross-pollination is the likely cause — another basil bloomed nearby at the same time. Isolate your seed plant next season, or embrace the blend and save seed from the best-tasting seedlings.
The plant died before the seed ripened. A hard freeze can cut the season short. In short-season climates, pot up your seed plant in early fall and bring it to a sunny indoor spot to finish ripening.
The Fall Habit That Pays Every Spring
Saving Thai basil seed asks for about one afternoon of attention across the whole fall: choose a plant in late summer, ignore it gracefully while it flowers, snip the brown spikes into a bag, rub out the seed at the kitchen table, and tuck the envelope away. In return, every spring starts with seed you know, from plants that already proved they like your patio.
Start with one plant this year. Once a labeled envelope of your own seed sits in the drawer, buying basil seed feels optional.